ChirpyWeb Account > Campaigns > Create
You can easily create and send campaigns to your subscribers by clicking on the ‘Create‘ under the ‘Campaigns‘ tab.
Campaign Content:
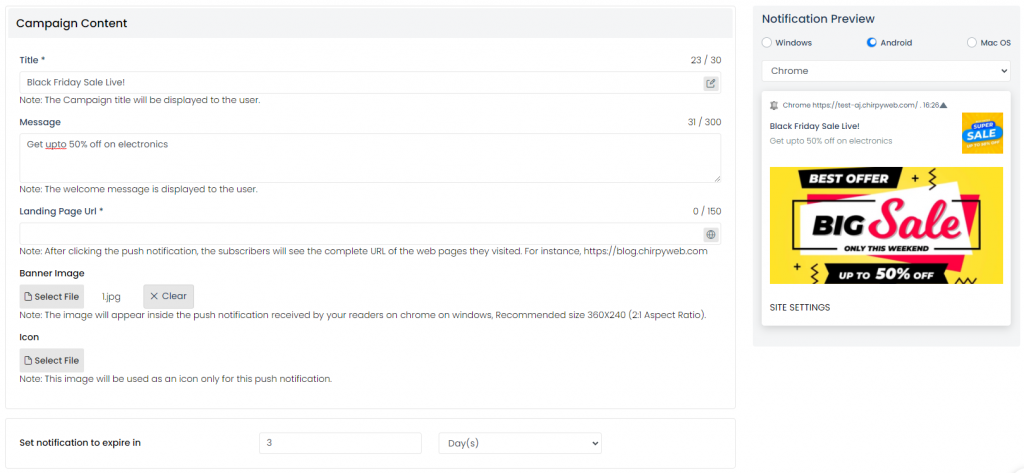
Set up the content of your notification, add the notification Title, Message, Landing URL, Banner Image and update Icon. Through the Notification Preview section, see how the notification would look on different browsers and operating systems. Also, Set an expiry to the notification – you do not want your subscribers to receive the notification after the flash sale is over.
CTA’s (Call To Action Buttons):
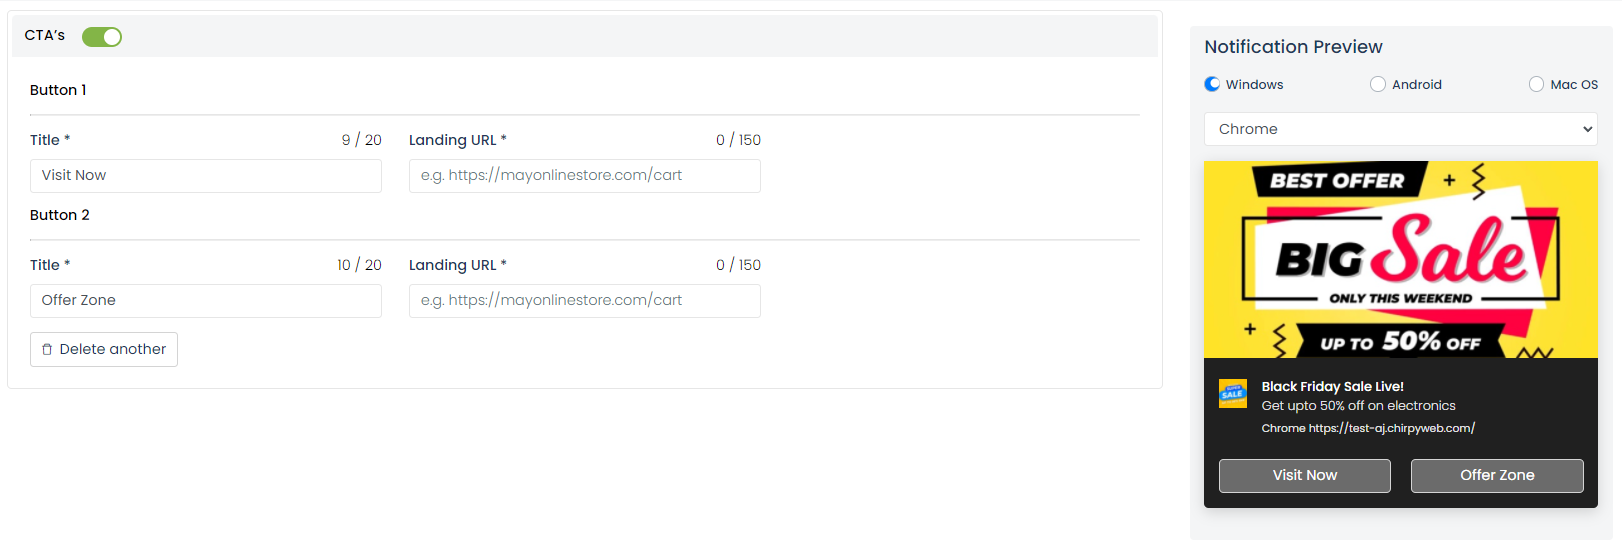
Add custom CTA buttons (upto two). Customize the button titles and add their landing URLs.
Audience:
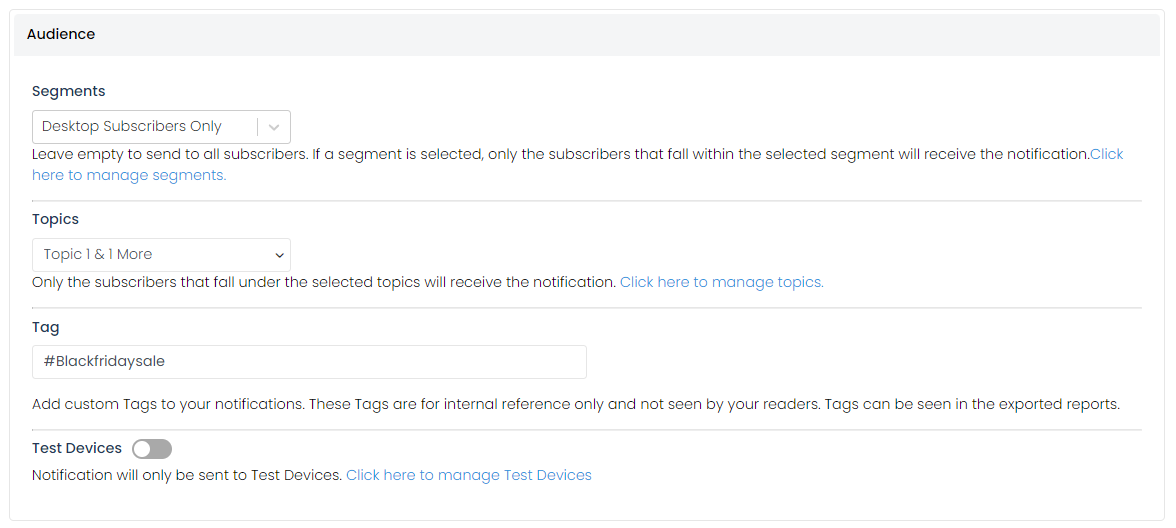
This section lets you choose your audience to whom you would like to send notifications. Selecting Audience can be done by choosing different Segments, Topics or Test Devices. Also, you can add custom Tags to your notifications which help filtering the exported CSV report.
Timing:
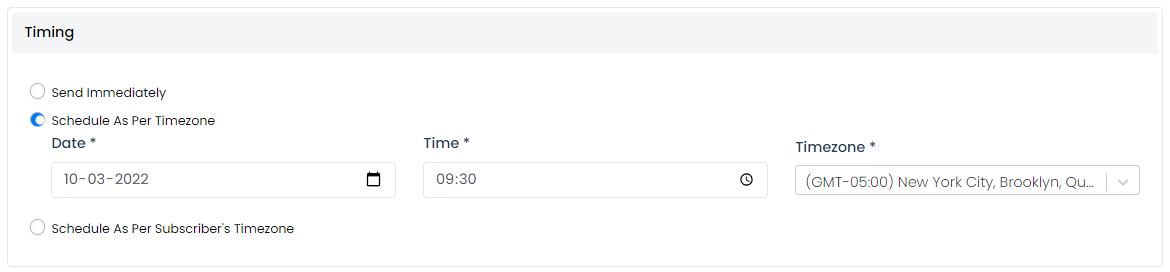
Timing lets you choose the trigger of the notification. The options available are:
- Immediately
- Schedule as per time zone
- Schedule as per subscriber time zone